How to Test My Dryer Element for Continuity
As an Amazon affiliate, we earn a commision from qualifying purchases.
I will show you how to test heating element in dryer in this article- testing is important because it is the only way you can be sure the part is the culprit if your appliance is acting up(if so, it needs to be replaced).
Let us get started.
How to test heating element in dryer [steps]
First check to see if any of the coils are detached or broken.
If so, then, your heating element could be shorted and will require to be replaced.
So follow these steps to test the heating element of your dryer to be sure it is the root cause of your dryer problems- the steps work for nearly all dryer models( from Samsung to LG to Whirlpool).
Quick Tip: Make sure you first disconnect and remove the heating element from your dryer before testing it.
How to test heating element in dryer
Now, if none of the coils appear broken, you should use a multimeter to test the element for continuity.
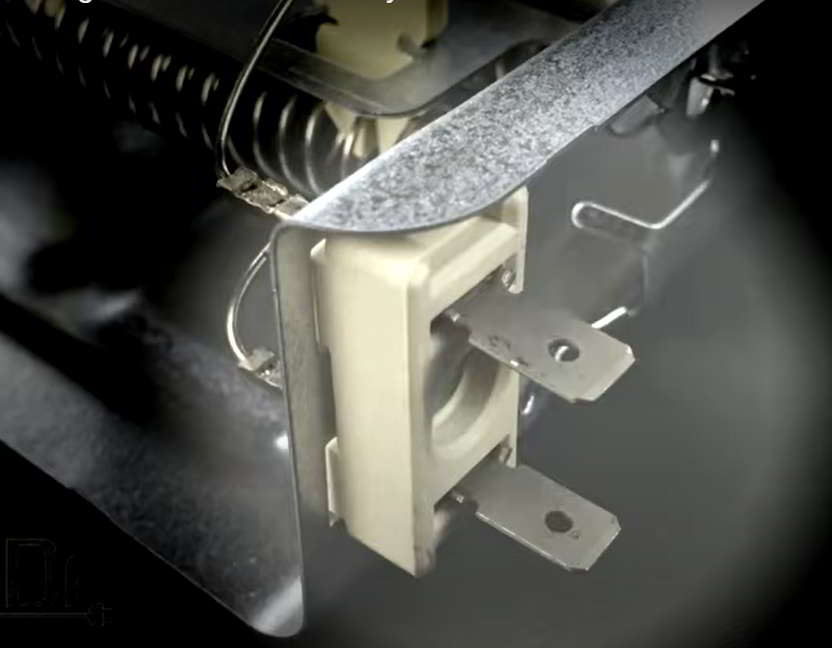
How to test heating elements with 2 terminals
Here is the procedure if your dryer heating element has 2 terminals

Method 1 – using continuity setting
If your multimeter has this option, turn it to the continuity setting.
You then place the probes on the wire terminals.
Now, if the element has continuity, your multimeter should make a beeping sound.
Otherwise, if there is no continuity, then there's a decent chance that the heating element is gone and you need to change it out.
Method 2 – ohm setting
If your multimeter does not have the continuity setting, then this is the setting you should use.
First, set your multimeter to the lowest ohm setting.
Next, place the probes on the wire terminals.
Here is the thing: If your element has continuity, you should get a reading of between 5 and 50 ohms.
If not- If your display does not change or you get a reading that is far from this range- then your element could be damaged and you likely have to replace it.
How to test heating elements with 3 or more terminals

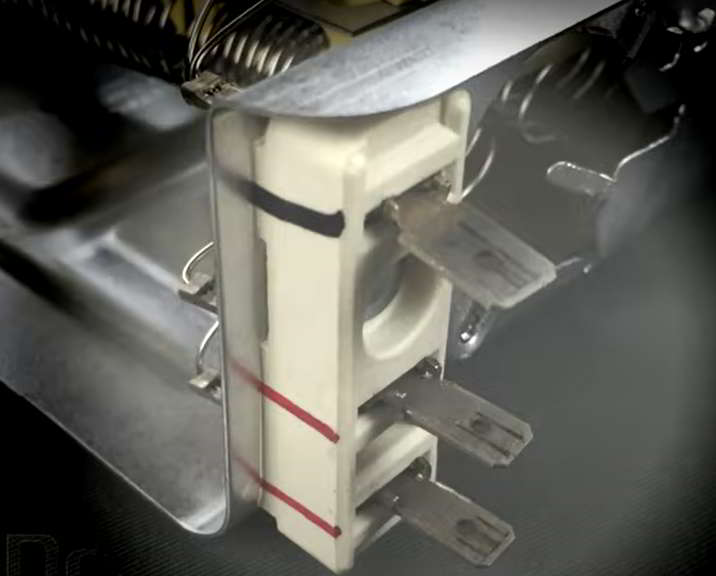
For such terminals, you will first need to find the common wire terminal.
Just know that this is the terminal that has 2 or more wires attached to it(The other terminals will have only 1 wire attached to them).
Method 1 – continuity setting
- Set your multimeter to the continuity setting.
- Place one of the probes on the common wire terminal.
- Place the other probe on the 2nd
- Repeat step 3 for the other wire terminals.
- If there's continuity, steps 3 and 4 above will make your multimeter beep. Of course, your heating element could be gone if you do not hear any beeping sound (meaning there's no continuity).
Note: it is possible for one terminal to have continuity and the other to lack. In that event, you should replace the whole element.
Method 2 – ohm setting
- Set your multimeter to the lowest ohm reading.
- Place one of the probes on the common wire terminal.
- Place the other probe on the 2nd
- Repeat step 3 on the other wire terminals.
- If the element has continuity, steps 3 and 4 above will each produce a reading of between 5 and 50 ohms.
Now, if you get a reading that is off from this range or your display does not change on any of the terminals, then your element might be damaged and you should replace it.
Important tip: when you test the heating element, ensure you also check (for continuity)between the posts as well as between the post & the element case itself. That can help save you a lot of headaches later on.
Test to see if the element is shorted
Now, the other test you can perform on your heating element is to see if it is shorted.
To achieve this, place one of the probes on the element's housing and the other on one of the terminals. Repeat this for all the terminals.
If any of these tests indicate continuity, then, you have a shorted heating element and you should replace it.
How to test dryer heating element without multimeter
If you can't access a multimeter, you can try using a 9-volt battery and connect each terminal(from your battery onto a terminal from your heating element) and feel if your battery heats up.
How do you know if the heating element is bad in my dryer?
Here is how to know if heating element is bad in dryer (the tell-tale signs that you have a troubled heating element).
- Dryer is taking too long to dry clothes
- There's no heat in the dryer but it is still spinning
If your dryer displays any of the above signs, then you probably have a faulty heating element.
And please note these signs do not always point to a shorted heating element.
Yeah….the truth is it could be other problems like broken element wiring.
So you want to visually check if there are any breaks along the element wiring- breaks in your dryer's heating coil often result in drying issues(patch up any breaks you find with a cutting of copper wire- just repeatedly wrap the wire around broken sections of the coil).
Now, for the sake of starters, it is also important that we answer this question:
Where is the heating element in a dryer?
Well, on some dryer models, the heating element is located at the back of the dryer behind the back panel.
But in other models, it is normally located at the bottom just behind the dryer drum.
How to test heating element in dryer – in summary
Just use an ohmmeter to check the resistance(of the element)- The element is probably bad if it is an open circuit.
If it is faulty, make sure to get a replacement that fits your model as there are different makes of heating elements meant for different dryer models.
Here is one that fits most Whirlpool, Roper, Maytag, Kenmore, Amana, Admiral, and Cabrio Dryer models.
ALSO READ:
How to test thermal fuse on dryer [Steps]
Samsung dryer moisture sensor test and repairs
Source: https://machinelounge.com/how-to-test-heating-element-in-dryer/
0 Response to "How to Test My Dryer Element for Continuity"
Post a Comment